TL;DR
- What: Replacing the front control arms (inner and outer ball joints) and the front control arm bushings (FCABs) on the E36 chassis.
- Why: Cures steering wheel shimmy under braking, restores crisp turn-in, and eliminates clunking over bumps caused by failed ball joints and torn rubber bushings.
- Effort: A weekend, requiring a lift or jack stands, ball joint separators, and a shop press or bushing tool.
- Difficulty: 3/5
Symptoms of Worn FCABs and Ball Joints
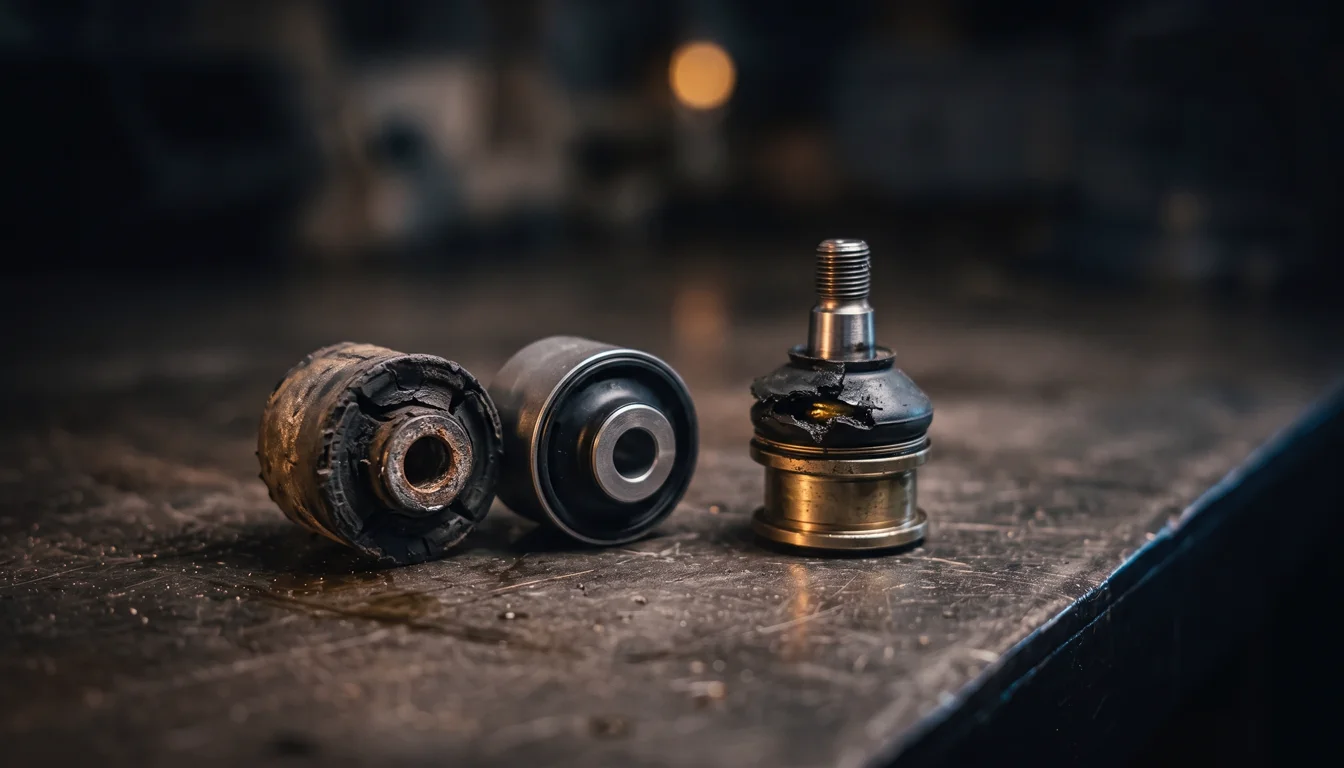
The E36 front suspension relies on a MacPherson strut design paired with a lower L-shaped control arm. This arm connects to the chassis at two points (an inner ball joint on the subframe and the FCAB housed in a bracket, commonly called the “lollipop”) and to the steering knuckle at one point (the outer ball joint).
When these components wear out, the front suspension geometry loses its rigidity, leading to severe dynamic alignment changes while driving. On a 25-year-old E36, the original factory components have typically failed entirely unless previously replaced. Common symptoms include:
- Steering Wheel Shimmy Under Braking: The most frequent indicator of a torn FCAB. When the brakes are applied, the front wheels are forced backward. A failed bushing allows the control arm pin to deflect, causing a rapid oscillation in the steering wheel, often most prominent at highway speeds.
- Wandering and Tramlining: Worn outer ball joints or soft FCABs allow the front wheels to follow ruts and imperfections in the road surface (tramlining), requiring constant steering corrections to maintain a straight line.
- Clunking Over Bumps: Sharp metallic knocks when driving over potholes or speed bumps usually point to excessive vertical or lateral play in the inner or outer ball joints.
- Vague Steering Feel: A general loss of the sharp, responsive turn-in characteristic of the E36 chassis.
Because the inner and outer ball joints are permanently pressed into the lower control arm from the factory, a failure of either ball joint requires replacing the entire control arm assembly.
Control Arm and FCAB Geometry: Non-M vs. M3
The E36 platform features a fragmented ecosystem of control arms and bushings. Selecting replacement parts requires understanding how BMW altered the caster geometry between the non-M, early M3, and late M3 models. Caster dictates high-speed stability and steering returnability; increasing positive caster moves the wheel further forward in the wheel well.
Non-M E36 (1992–1999)
Non-M models utilize standard control arm geometry and a centered, webbed rubber FCAB. The webbed design features air gaps (voids) in the rubber to absorb noise, vibration, and harshness (NVH). This compliance makes for a comfortable street ride but allows significant deflection under heavy cornering or braking.
1995 E36 M3 (3.0L)
For the inaugural E36 M3 in North America, BMW sought to increase positive caster for better handling dynamics. They achieved this by pairing a distinct lower control arm with an offset, solid rubber FCAB. The offset bushing physically pushes the rear pin of the control arm outward, which levers the outer ball joint forward, adding caster.
1996–1999 E36 M3 (3.2L)
With the update to the 3.2L engine, BMW revised the front suspension geometry entirely. The 1996+ M3 features a redesigned lower control arm and specific upper strut mounts to achieve the desired high-caster alignment without relying on the bushing. Because the geometry was corrected at the arm and strut tower, the 1996+ M3 reverted to a centered, solid rubber FCAB.
Mixing and Matching Upgrades
Many E36 owners modify their suspension geometry using these factory variations. However, mixing components incorrectly will lead to severe alignment issues.
- Non-M Upgrades: Installing 1995 M3 offset FCABs into a non-M E36 is a common OEM-plus upgrade. It increases positive caster, improving high-speed stability and turn-in response while remaining completely bolt-on.
- 1996+ M3 Warning: Never install offset FCABs on a 1996+ M3. The combination of the revised control arm and an offset bushing pushes the wheel too far forward, resulting in heavy tire rub against the front bumper and fender liners.
| Model Application | Bushing Type | FCAB Design | Control Arm Geometry | Resulting Caster |
|---|---|---|---|---|
| Non-M E36 | Centered | Webbed (Compliant) | Standard | Standard |
| 1995 M3 (3.0L) | Offset | Solid (Stiff) | M3 Early | High |
| 1996–1999 M3 (3.2L) | Centered | Solid (Stiff) | M3 Late | High |
Bushing Material Choices
When replacing the FCABs, the choice of material dictates both the installation process and the resulting chassis feedback.
OEM Rubber (Webbed or Solid): Rubber bushings provide the best NVH isolation. Upgrading a non-M to the centered solid rubber bushing from the 96+ M3 eliminates the voided design for sharper steering without introducing harshness. Rubber bushings require a hydraulic shop press or a threaded puller to install into the lollipop bracket. Furthermore, the rubber relies on bonding to the control arm pin. A specialized evaporating lubricant (or diluted dish soap) must be used during installation, and the vehicle must be lowered to normal ride height before the lubricant dries to prevent the rubber from twisting and tearing prematurely.
Polyurethane: Polyurethane FCABs drastically reduce deflection and are often manufactured in a two-piece design that can be pressed into the lollipop bracket by hand or with a bench vise. Because the control arm pin pivots freely inside the polyurethane sleeve, there is no need to pre-load the suspension at ride height. However, polyurethane requires liberal greasing with a high-tack silicone grease to prevent binding and squeaking.
Crucial Note on Offset Polyurethane: If installing an offset polyurethane bushing, a common preventative measure is drilling and tapping the lollipop bracket to install a set screw. Polyurethane lacks the metal outer sleeve interference fit of OEM rubber, meaning an offset poly insert can physically rotate inside the bracket during hard driving, completely ruining the caster alignment.
Spherical/Delrin: Reserved strictly for dedicated track vehicles, these materials offer zero deflection and maximum feedback. They transmit every road imperfection directly into the chassis frame rail and are unsuited for street use.
Removal Procedure: Inner and Outer Ball Joints
Replacing the front control arms requires separating three attachment points per side. Ensure the vehicle is safely supported on jack stands or a lift, and remove the front wheels.
1. The Lollipop Bracket (FCAB)
The rear of the control arm is secured to the chassis frame rail by the lollipop bracket, which is held in place by two M10 bolts. Removing these bolts allows the rear of the control arm to hang free.
2. The Outer Ball Joint
The outer ball joint secures the control arm to the steering knuckle. Remove the self-locking nut. Because the tapered pin is wedged tightly into the knuckle, a mechanical separator is required. Since the old control arm is being discarded, a traditional pickle fork and a heavy hammer can be used to break the taper loose, though this will destroy the dust boot. Alternatively, a clamshell-style ball joint separator can pop the joint free with controlled pressure.
3. The Inner Ball Joint
The inner ball joint secures the arm to the front subframe and is notoriously difficult to access. The securing nut sits on top of the subframe, heavily obstructed by the engine block and exhaust components.
- From Above: On some engine configurations, the nut can be accessed from the top of the engine bay using a long profile box-end wrench.
- From Below: The most common method involves attacking the nut from underneath the car. This requires passing a socket on a series of long extensions (often exceeding 24 inches in total length) combined with a universal swivel joint past the subframe to reach the nut.
Once the nut is removed, use a pickle fork to separate the inner ball joint taper from the subframe, freeing the entire control arm assembly.
Installation and Pressing the FCAB
If reusing the original cast iron lollipop brackets, the old bushings must be pressed out using a hydraulic shop press.
- Alignment Marks: OEM rubber FCABs feature an alignment mark (usually an arrow or a raised notch) that must line up with a corresponding casting mark on the lollipop bracket. Proper clocking ensures the internal structure of the rubber is oriented to handle suspension travel correctly.
- Pressing the Bushing: Press the new bushing into the bracket ensuring it sits flush and square.
- Installing the Control Arm: Fit the new control arm into the vehicle, securing the inner and outer ball joints to the subframe and steering knuckle, respectively. Always use brand new self-locking nuts, as the original hardware loses its thread-locking capabilities once removed.
- Lubrication (Rubber Only): If installing rubber bushings, apply a temporary, evaporating lubricant (such as P-80 or a mild dish soap solution) to the rear hex pin of the control arm and the inner bore of the FCAB. Do not use petroleum grease or anti-seize on rubber bushings, as the rubber must eventually grip the pin to function properly.
- Final Assembly: Push the lollipop bracket assembly onto the control arm pin and bolt the bracket to the chassis frame rail.
Torque Specifications and Final Checks
Proper torque is critical for suspension components to prevent binding or catastrophic failure. Avoid using an impact wrench for final tightening. Always check the workshop manual for your specific engine and model year, but expect to reference and torque the following connections accurately:
- Inner ball joint to front subframe
- Outer ball joint to steering knuckle
- Lollipop bracket (FCAB) to chassis frame rail
- Sway bar end link to control arm (or strut body, depending on M vs. non-M configuration)
Note: If OEM rubber FCABs are installed, the vehicle must be lowered to the ground so the suspension settles at its natural ride height before the evaporating lubricant dries. This ensures the bushing bonds to the control arm pin in its neutral position without twisted pre-load.
What’s Next
Any time the control arms or FCABs are replaced, the vehicle’s alignment is significantly altered. A professional front-end alignment is mandatory to reset the toe specifications, as the new joints and tighter bushings will shift the wheels away from their previous positions. Failing to align the car immediately will result in rapid, uneven tire wear and unpredictable handling characteristics.
For a deeper dive into optimizing your alignment specifications after a refresh, review our BMW E36 Suspension Geometry Setup: Optimizing for Street, Track, and Drift. If the steering still feels vague after refreshing the control arms, it may be time to inspect the steering rack and inner tie rods, which can be upgraded concurrently using the BMW E36 Steering Rack Swap: Complete E46 Purple Tag & Z3 Conversion Guide.