TL;DR
- What: Installing an OBD1 M50B25 intake manifold onto an OBD2 M52 (2.8L) or S52 (3.2L) engine.
- Why: The M50’s larger runners let the engine breathe better above about 5,000 RPM. Owners typically report 15–20 hp at the top end (dyno results range from about 7 to 26 hp, the bigger numbers with a tune), at the cost of a little low-RPM torque.
- Shopping list: used M50B25 manifold, Turner adapter kit, injector O-rings and a fresh crankcase vent valve.
- Time: plan a full day in the garage.
- Difficulty: 3/5 (Mostly bolt-on with an adapter kit; the vacuum lines and two drilled holes need care to avoid idle problems).
The Science Behind the Swap: M50 vs M52 Flow Characteristics
BMW’s shift from the OBD1 M50 engine to the OBD2 M52 engine brought a change in intake manifold philosophy. To favour low-end torque, BMW gave the M52 (and the US-spec S52) an intake manifold with noticeably narrower runners than the M50’s.
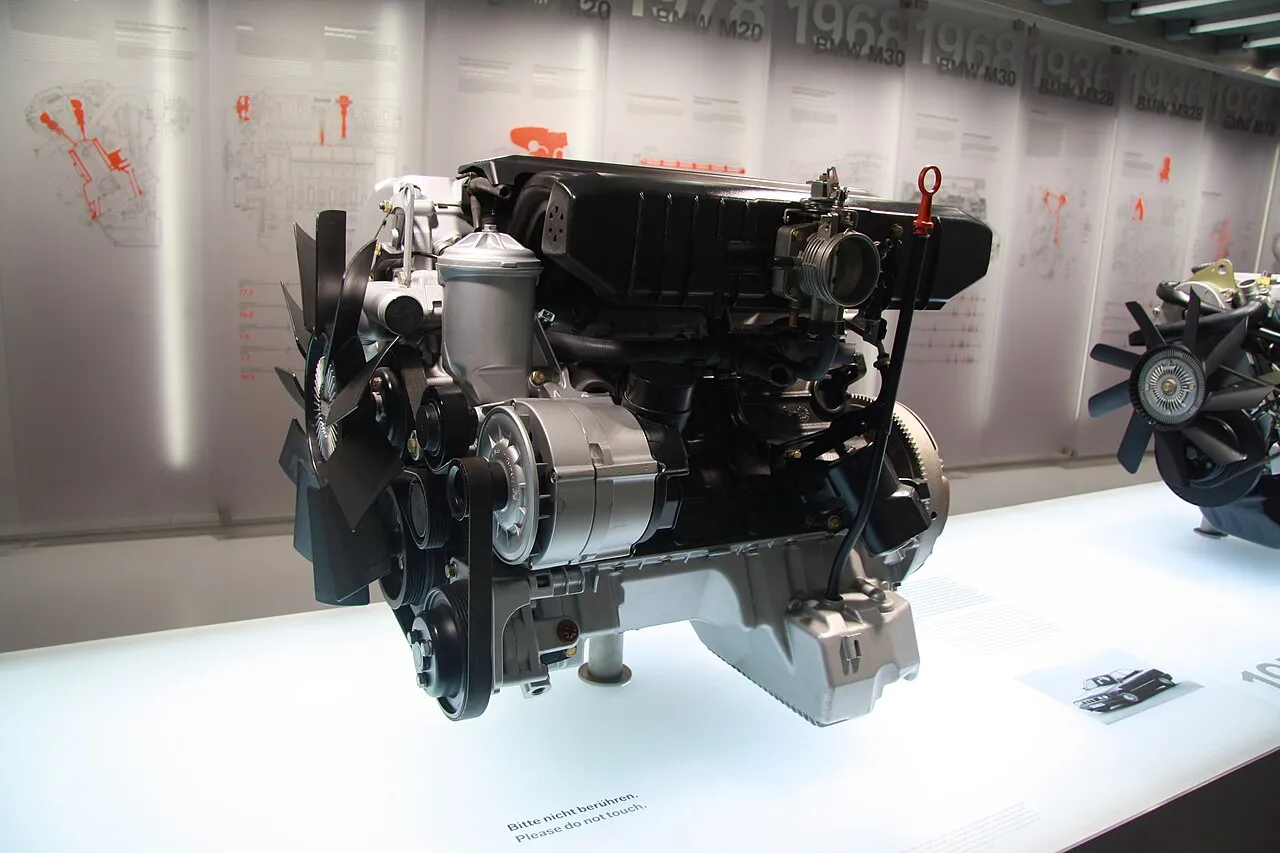
The narrow M52 runners keep air speed high at low RPM, which gives good low-end torque, but they become the restriction above roughly 5,000 RPM. Fitting the M50B25 manifold (from a 1992–95 325i, a 1991–95 525i or a 1995 US M3) onto your 2.8 L or 3.2 L engine moves the power band upward: peak power arrives later and higher, and you give up a little torque low down. Reported gains vary a lot between cars and dynos, from about 7 hp with the manifold alone to the mid-20s with a matching tune; 15–20 hp at the top end is the common figure.
Comprehensive Parts List and Conversion Hardware
While you can technically piece together plumbing from a hardware store to make this work, we heavily advise against it. The vacuum leaks inherent in a DIY “Home Depot plumbing” approach will cause erratic idles and lean codes.
This guide follows the Turner Motorsport MAN-1 adapter kit, because it is the best documented. Its approach is different from hose kits: a CNC-machined adapter bolts under the M50 manifold and carries your M52’s original vacuum baseplate, so the idle control valve, crankcase vent valve, intake air temperature sensor and every small vacuum line stay on factory parts in roughly their factory place. Other kits (BimmerWorld’s silicone hose kit, or bracket-only kits such as Epytec’s) route things differently, so follow your own kit’s instructions where they differ.
Here is what you need for a reliable, OEM+ installation:
| Part / Component | BMW Part Number / Spec | Notes |
|---|---|---|
| M50B25 Intake Manifold | Used, from a 1992–95 325i, 1991–95 525i or 1995 US M3 | Sourced used (eBay / local breakers). Avoid M50B20 manifolds: their ports are smaller than the M52 head’s. Inspect for cracks. |
| Turner MAN-1 Adapter Kit | Turner Motorsport | Adapter, manifold profile gaskets, throttle body profile gasket, fuel rail adapter plates, crankcase vent hose extension, M50 temp-port plug, FPR nipple cover, hardware. No separate gaskets needed. |
| Injector O-rings | Check by VIN on RealOEM | Replace while the rail is out. |
| Drill bit | 11/32” (≈ 8.7 mm) | Two holes in the manifold for the secondary air lines. |
Adapting the Throttle Body and Fuel Rail
The physical bolt patterns between the M50 and M52 components do not match, requiring specific adaptations before the manifold ever enters the engine bay.
1. The Throttle Body Adapter
The M52 throttle body does not seal directly against the M50 manifold. The kit supplies a stainless steel adapter plate and an M50 throttle body profile gasket; the plate goes between the manifold and the throttle body. Fit the new runner and throttle body gaskets supplied with the kit before the manifold goes on.
2. Fuel Rail Adapter Plates
The M52 fuel rail does not line up with the M50 manifold’s mounting points. The kit’s adapter plates (with screws and captive nuts) position the rail on the new manifold. Test-fit the rail before installation: it may need slight, gentle bending to clear an intake runner, and it rubs on a support boss on the manifold, so shave a little plastic off that boss. Then take the rail off again, because final fitting is easier once the manifold is on the engine. While the rail is out, replace the injector O-rings (look up the right ones for your engine by VIN) and lubricate the new ones with a dab of clean engine oil.
3. The Intake Air Temperature Sensor
With this kit nothing needs tapping. Your M52 intake air temperature sensor stays in the vacuum baseplate, which moves to the new adapter. The M50 manifold’s own temperature-sensor port is closed with the plug (and O-ring) supplied in the kit.
The Nightmare Unraveled: Vacuum and CCV Routing
This is where most M50 swaps go wrong. The M50 manifold was built for the simpler OBD1 setup and has no place for the M52’s crankcase vent valve, purge valve and other vacuum consumers. The Turner adapter solves this by moving the M52’s whole vacuum baseplate across, so almost every connection keeps its factory partner.
Moving the Vacuum Baseplate
- Fit the adapter to the M50 manifold, hardware snug but loose.
- Unscrew the vacuum baseplate from the old M52 manifold and transfer it to the adapter with the supplied screws.
- Reinstall the idle control valve, the crankcase vent valve and the dipstick tube bracket on the baseplate, and reconnect the small hoses for the fuel pressure regulator, the purge valve and the secondary air pump solenoid to their nipples. Mark each hose before you pull it off the old manifold, so it goes back on the same nipple.
The fuel pressure regulator on the M52 sits on the fuel filter under the car, not on the fuel rail; its vacuum hose simply returns to its baseplate nipple.
The M50 Manifold’s Own Ports
- Brake booster: reconnect the original booster vacuum line to the M50 manifold’s booster port.
- M50 fuel pressure regulator nipple: not used. Cap it with the cover supplied in the kit.
- M50 temperature-sensor port: not used. Close it with the supplied plug and O-ring.
Secondary Air Pump Solenoid
The solenoid loses its old mounting position. Drill two 11/32” holes in the plastic bridge between intake runners 1 and 2 (Turner specifies 1” and 2.25” down from the plastic ridge), feed the solenoid’s lines through them, and set the solenoid on top of the manifold; it is not fastened down.
Crankcase Vent Tube
The vent valve now sits slightly further from the cylinder head, so the vent tube between them must be lengthened. Cut the stock tube in the middle of its solid section, fit the kit’s rubber extension and heat-shrink both joints, then reconnect it to the head and to the vent valve under the manifold.
Mechanic’s Tip: On a 25-year-old E36, the plastic CCV housing and its ribbed hoses are extremely brittle. We highly recommend replacing the entire CCV unit (11151703484) and the valve cover breather hose (11151703775) while the manifold is off. It adds a little to the bill but saves you from having to pull the manifold again next month.
Installation and Post-Swap Verification
Before the manifold goes on, make room underneath: push the two hard-rubber coolant pipes that run from the block towards the frame rail down slightly, and put a small downward bend in the starter battery cable. Pre-install the manifold support brackets between the adapter and the manifold without mixing up front and rear; the front bracket usually needs bending to clear the vent valve in its new position.
Plug the idle control valve’s connector in while lowering the manifold onto the head, because it is hard to reach once the manifold is down. The manifold should sit flush against the cylinder head without force; if you have to push, something is trapped underneath.
Torque the M7 manifold nuts to 15 Nm (11 lb-ft), working from the center outward. Over-torquing will crack the plastic flange. Then check the clearance between the valve brackets, the starter cable and the coolant pipe, and tighten the support brackets.
Finish by fitting the fuel rail (feed line from the fuel filter to the feed side; mark both lines before you take them off), the injector and O2 sensor connectors, the camshaft sensor plug, the throttle body on its adapter plate, the brake booster line and the intake.
Mandatory Smoke Testing
Before starting the car, a smoke test is virtually mandatory. Hook a smoke machine up to the intake boot. If you see smoke escaping from under the fuel rail, the adapter plate, or the bottom of the plenum, stop and fix it. An M52 will flat-out refuse to idle correctly if there is even a pinhole leak post-MAF.
Engine Management and Tuning Requirements
Can you run an M50 manifold on the stock MS41 ECU tune? Yes. The MAF will read the increased airflow and add fuel accordingly, and the engine will adapt via long-term fuel trims.
Should you run it untuned? Absolutely not.
Running the stock tune leaves part of the gain on the table: the factory fuel and ignition maps were written for the narrow-runner manifold. A dedicated M50 manifold tune (commercial software such as Turner’s Shark Injector, or a custom map flashed with tools like MS41 Quickflash) typically adds:
- Fuel and Timing Optimization: The tuner adjusts the VE tables and advances ignition timing past 5,000 RPM, where the new manifold flows best.
- Rev Limiter Increase: The factory limiter cuts in around 6,500 RPM, right where the M50 manifold is strongest. M50-manifold tunes commonly raise it to 7,000–7,200 RPM.
- Idle Adjustment: Some tuners will slightly raise the target idle speed (from ~700 to ~800 RPM) to compensate for the larger plenum volume, preventing any minor idle dips when coming to a stop.
What’s Next?
With the M50 manifold swap complete, your M52 or S52 has shed its biggest factory bottleneck. To fully exploit the new high-RPM breathing capability, your next focus should be on the exhaust side. Upgrading to S52/M3 tubular exhaust manifolds (if you have an M52) or fitting a high-flow midsection will ensure the air you’re now efficiently pulling in can escape just as quickly.